My version of a story
This is an activity focusing on one of the most determining parameters of audio-visual narration, namely the juxtaposition of separate shots and the continuity of action. Young participants may create a photo-narration of a simple story by using series of images and written dialogues in bubbles or even 'written' sounds in a comic-strip form.
Material needs: one simple still camera or tablet/ smart phone for each group, a laptop to edit each group's presentation and a projector for screening final presentations. A color printer can be useful for printing photo narrations for an exhibition.
Step by step procedure: The group is divided in smaller groups and they all consider the following short introduction to the basic principles of an audio-visual narration:
During an audio-visual narration, although the main characters take part in the action all the time, we do not see them all at the same time. At any moment of the narration, the frames guide the viewer’s attention towards the point which the director-narrator has decided is most important for the purposes of his/her narration.
As a result, through viewing the individual images sequentially, we mentally create the continuity of the story, while the predominant elements are those that the director-narrator intended to highlight. In other words, a narrator tries to tell his/her story in the most exciting possible way. Of course, it is possible that another narrator could narrate exactly the same story but produce a different impression by focusing on other elements of the action, that is, by selecting completely different images

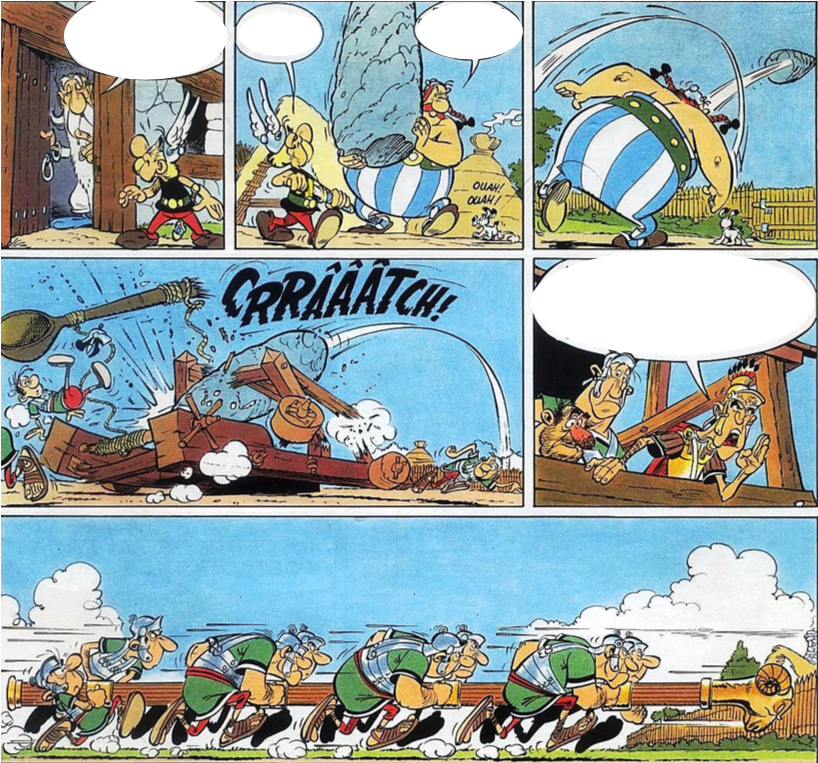
This is an example of a photo narration. A similar type of audio-visual narration characterizes cinema! The main difference, however, is that in a film, the images are presented one after the other on the screen, rather than in the case of a printed comic book page, where the images appear one beside the other; and, of course, films are moving images accompanied by sound. More specifically, film narration utilizes separate sections of moving images, which are also called shots.
After going through the introduction, small groups may plan their own narration-projects: "To produce a fictional photo-narration using 10-12 consecutive still photos (at least: two long shots, three medium shots and five close-up shots) either in a comic strip form with printed photos accompanied by written sounds in bubbles (dialogue, short texts, sounds), or in a screening form with photos accompanied by recorded/downloaded sounds (like a video or a PPT)". The projects can be planned in creative steps:
Step 1: Make up your own simple story.
Limit the story's action to one specific time and place involving not more than to 1-2 main heroes. It will help if you create a story with heroes of your age. Write the dialogues using everyday language.
Participants may create brief stories from their daily youth life, such as:
- The mobile phone which shouldn’t ...
- A wrong SMS ...
- When the sandwiches were lost ...
- So close and yet so far ...
- "Would you like to be in my position?"
- "I’m not interested! It’s your problem!"
- "Mind your own business!"
Step 2: Plan your photos on paper (create a written plan or a storyboard)
The 10-12 photos may all picture moments of the story's action each focusing on what you consider as most important at each moment (at least: two long shots, three medium shots and five close-up shots).
- Long shots to reveal information about the place and the environment where the action takes place
- Medium shots to reveal information about who are the people involved, what are they doing, their relationships and their positions in space
- Close-up shots (faces, details) to reveal information about reactions and important elements at each moment
(find here more detailed descriptions)
Step 3: Choose your actors.
Step 4: Shoot your photos.
For each of the 10-12 photos of your plan you may have to shoot a number of alternative photos and later choose the best
For each photo of your plan, try to shoot at least 3-4 different viewing angles and distances from your subject as well as trials to achieve the right expressions on your heroes' faces
Step 5:In what sequence will the final 10- 12 chosen pictures be arranged?
Depending on the sequence of the final photos and of the bubbles (or sounds) you may be explanatory or even surprising. Discuss ideas and create a spicy narration!
Step 6: In what format will the photo narration be presented to the audience (e.g. as a slide show on screen, as a printed poster which is put on display, etc.)?
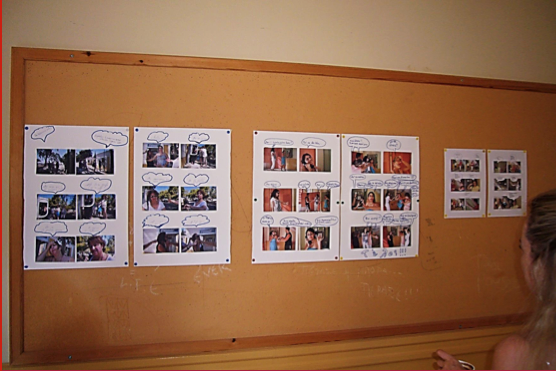
If poster, continue with step 7 and display your printed poster on a wall.
If slide show, move to step 8.
Step 7:Add bubbles. Your computer allows insertion of bubbles with short text. Different fonts may reflect shouting, whispering etc.
Usually bubbles are pointing to the speaking person. They can even point to a person who speaks but is out of the picture, or even they may point to more than one persons who say the same words at the same time.
Links for poster examples: See example_1 and exaple_2.
Step 8: Add sound. You can record dialogue corresponding to each photo , or music that will boost your narration or sounds mumbled or downloaded.
Links for video examples:
Have Fun!
Now it is time to try something even more exciting: ... a short video story!
The aim of the exercise is to practice narrative competencies through video trying different methods of filming a given action.
If we want to take a step from a photo story to a short video we need to consider not only framing but also the duration of the shot: how long will each separate shot be? What will happen within this shot and what part of the action should we keep for the next shot?
To realize the idea of separate shots within a video or film, one has to notice the change of a certain camera view to another camera view and so on. In any kind of video (whether in cinema, TV or You Tube), each shot is juxtaposed to the next and can be longer or shorter so that a series of shots create a narrative rhythm which can be calm or fast, quite homogenous or varied and include different surprises thanks to the art of editing. In other words, narrating an action can consist of a number of shots exactly like the separate pictures juxtaposed in a photo story. Each shot guides the viewer's attention to what the filmmaker considers as most important at each moment while the shot's length is decided to keep the viewer fascinated!
Starting from our photo story there are three different ways to step into video:
- Use the photo story to transform each still picture in a video shot. Same story, same actors, same camera positions. However, you will soon notice that both the details of the action and the camera angles might need minor adjustments. Video will offer a chance for a richer narrative, possibly with more complex relations between characters, setting and even feelings. On the other hand, it might create a loose, difficult to control material: the camera starts recording and an actor might neither be sure WHEN to start acting nor when to stop. He/she also might move covering other characters or part of the setting with his/her body, in an unwanted way. A good recipe would be to always consult the photo story as a 'guide' for your shooting. Finally, you will need to edit the material and that is where you will decide about the length of each shot. Experience will gradually make you better in deciding about ways of action during shooting and the exact length of your shots!
- Use your photo story to create a one take video based on the same narrative. In this case, the whole story has to be 'told' with a camera that never 'cuts' (stops). This is possible by having the camera continuously moving to 'capture' each moment of the action in the most fascinating way! Example: here
- Another simpler way to create a one take video, is to keep the camera almost 'locked' and have your action, heroes, details all moving around, back and forth in front of the stabilized camera. Example: here
You may use both techniques as each creates different effects in style and audience anticipation. It would help to think which part of the action will benefit from each directorial choice. Several famous films have used one take scenes which can be studied and enjoyed before directing your own.
Step 1: Go over your photo-story and decide which are the key moments. Exclude all elements that do not contribute to the story's understanding.
Step 2: Choose your camera position and framing in a way that all necessary setting information appear within your frame. A tripod will help you to keep the camera stable allowing minimum camera movements to keep your heroes within the frame.
Step 3: Looking through the camera's monitor, try -again and again- the full action of the story carefully planning the heroes' movements to be clear and not 'masking' each other. These trial-rehearsals should also focus on acting improvements.
Step 4: Proceed to your shooting. If something goes wrong, repeat the whole action all over.
All the decisions mentioned above require a process, ideally including steps like: individual suggestions by each group member (brainstorming), expressing arguments to support or oppose the suggestions, negotiating/compromising, making a final decision reflecting the whole group and implementing it, assessing the final result, and finally, presenting the narration to an audience of peers. A new phase of editing might follow, depending on feedback received from the 'audience'.
The publication was created as part of the project: EMELS.
This publication reflects the views only of the author, and the Commission cannot be held responsible for any use which may be made of the information contained therein.