
Different vision of open urban space
Organising institution:
European Development Agency (EUDA)
Country:
Czech Republic
Age:
11-12
Key question:
How various the visual perception of open urban space can be?
Objectives:
Track the possibilities of visual perception based on biological diversity and with the use of technology. The concrete place is seen and lived through human and animal's views.
Time:
3 lessons (1 lesson = 2h 15 min)
Software and apps to be used:
Apps: PhotoDirector, Colour Changer, Photoshop Fix, Mosaic Blur; software: Sony Vegas (for the bonus editing of captured video).
Brief presentation:
This project will show principals of visual reception, open a theme of the optic mechanisms of humans, animals, machines (their meaning, differences, consonants, limitations etc.). By observing documentary photos of animal eyes and their art study will focus and show the visual diversity of species' eyes. Shooting point of view as a chosen animal - using the camera and special free software for changing color mode - will find out what and how an animal can see. Focusing on animal's view will open the discussion about coexisting between us and them in the city environment. This more emphasizes the last task when students through the inspiration of new ways of communication in our digital epoch - blog, websites or chat - will tell a day/life story about their animals.
Topics covered:
Open public place, diversity of sights, colors, the animals in the neighborhood.
Civic engagement:
This project will mention that even though the city and its open urban space is designed for people, there are also animal neighbors - pets and wild animals. So the project can open discussion about coexistence and how it affects each other. Useful for that can be a connection between the local Natural Science Museum, Animal rescue station or veterinary. Together it could be created the exhibition of child creation in the urban open space with an accompanying program.
Preparation of space for the Atelier:
Room Obscura: darkened classroom
Animal Eye Study: materials in the middle of one big table where students sit around it/ or classic arrangement of class
As an Animal: outside (better in some park or location with trees, grass, plants...)
Materials needed:
- Room Obscura: cardboards to cover windows, tape.
- Animal Eye Study: papers, watercolor, ink, tempera, oil and soft pastels, brushes, objects for the imprint.
- As an Animal: cellphones, tablets/ iPads (PC - for bonus video editing).
- The story of the Animal: sticky paper blocks, onw smileys, printed photo of the animal eye and their vision.
Main inspirations taken from personal research:
- optics mechanim of sight;
- different perception of the same - biological, social, cultural diversity;
- possibilites of digital transformation of a picture.
Mass media and social media connections:
- documentary movie: Amazing evolution of eye;
- 3D game: Lets you see through an animal's eyes.
How do you plan to give voice to students to present or show their personal skills and knowledge?
The final task "Story of the animal" is kind of reflection of previous work, so there is a space for students to use and show their gained knowledge. To mixed gained knowledge with a fantasy, because the concrete animal was the one who presents itself.
Introducing students to the key question - the research begings:
In a completely blinded room will children get a question: "What we need to see the world around us?". After it will be let in the light through a small hole (Room obscura).
Experimental phase
- Action that unfolds the practical activity to clarify the question and advence to the first answers: Realization of "Room Obscura" which shows how sight and optical instrument for recording or capturing images works. Visual samples of animal eyes - emphasis on diversity. Discussion and writing a list of animals that can live at the chosen location.
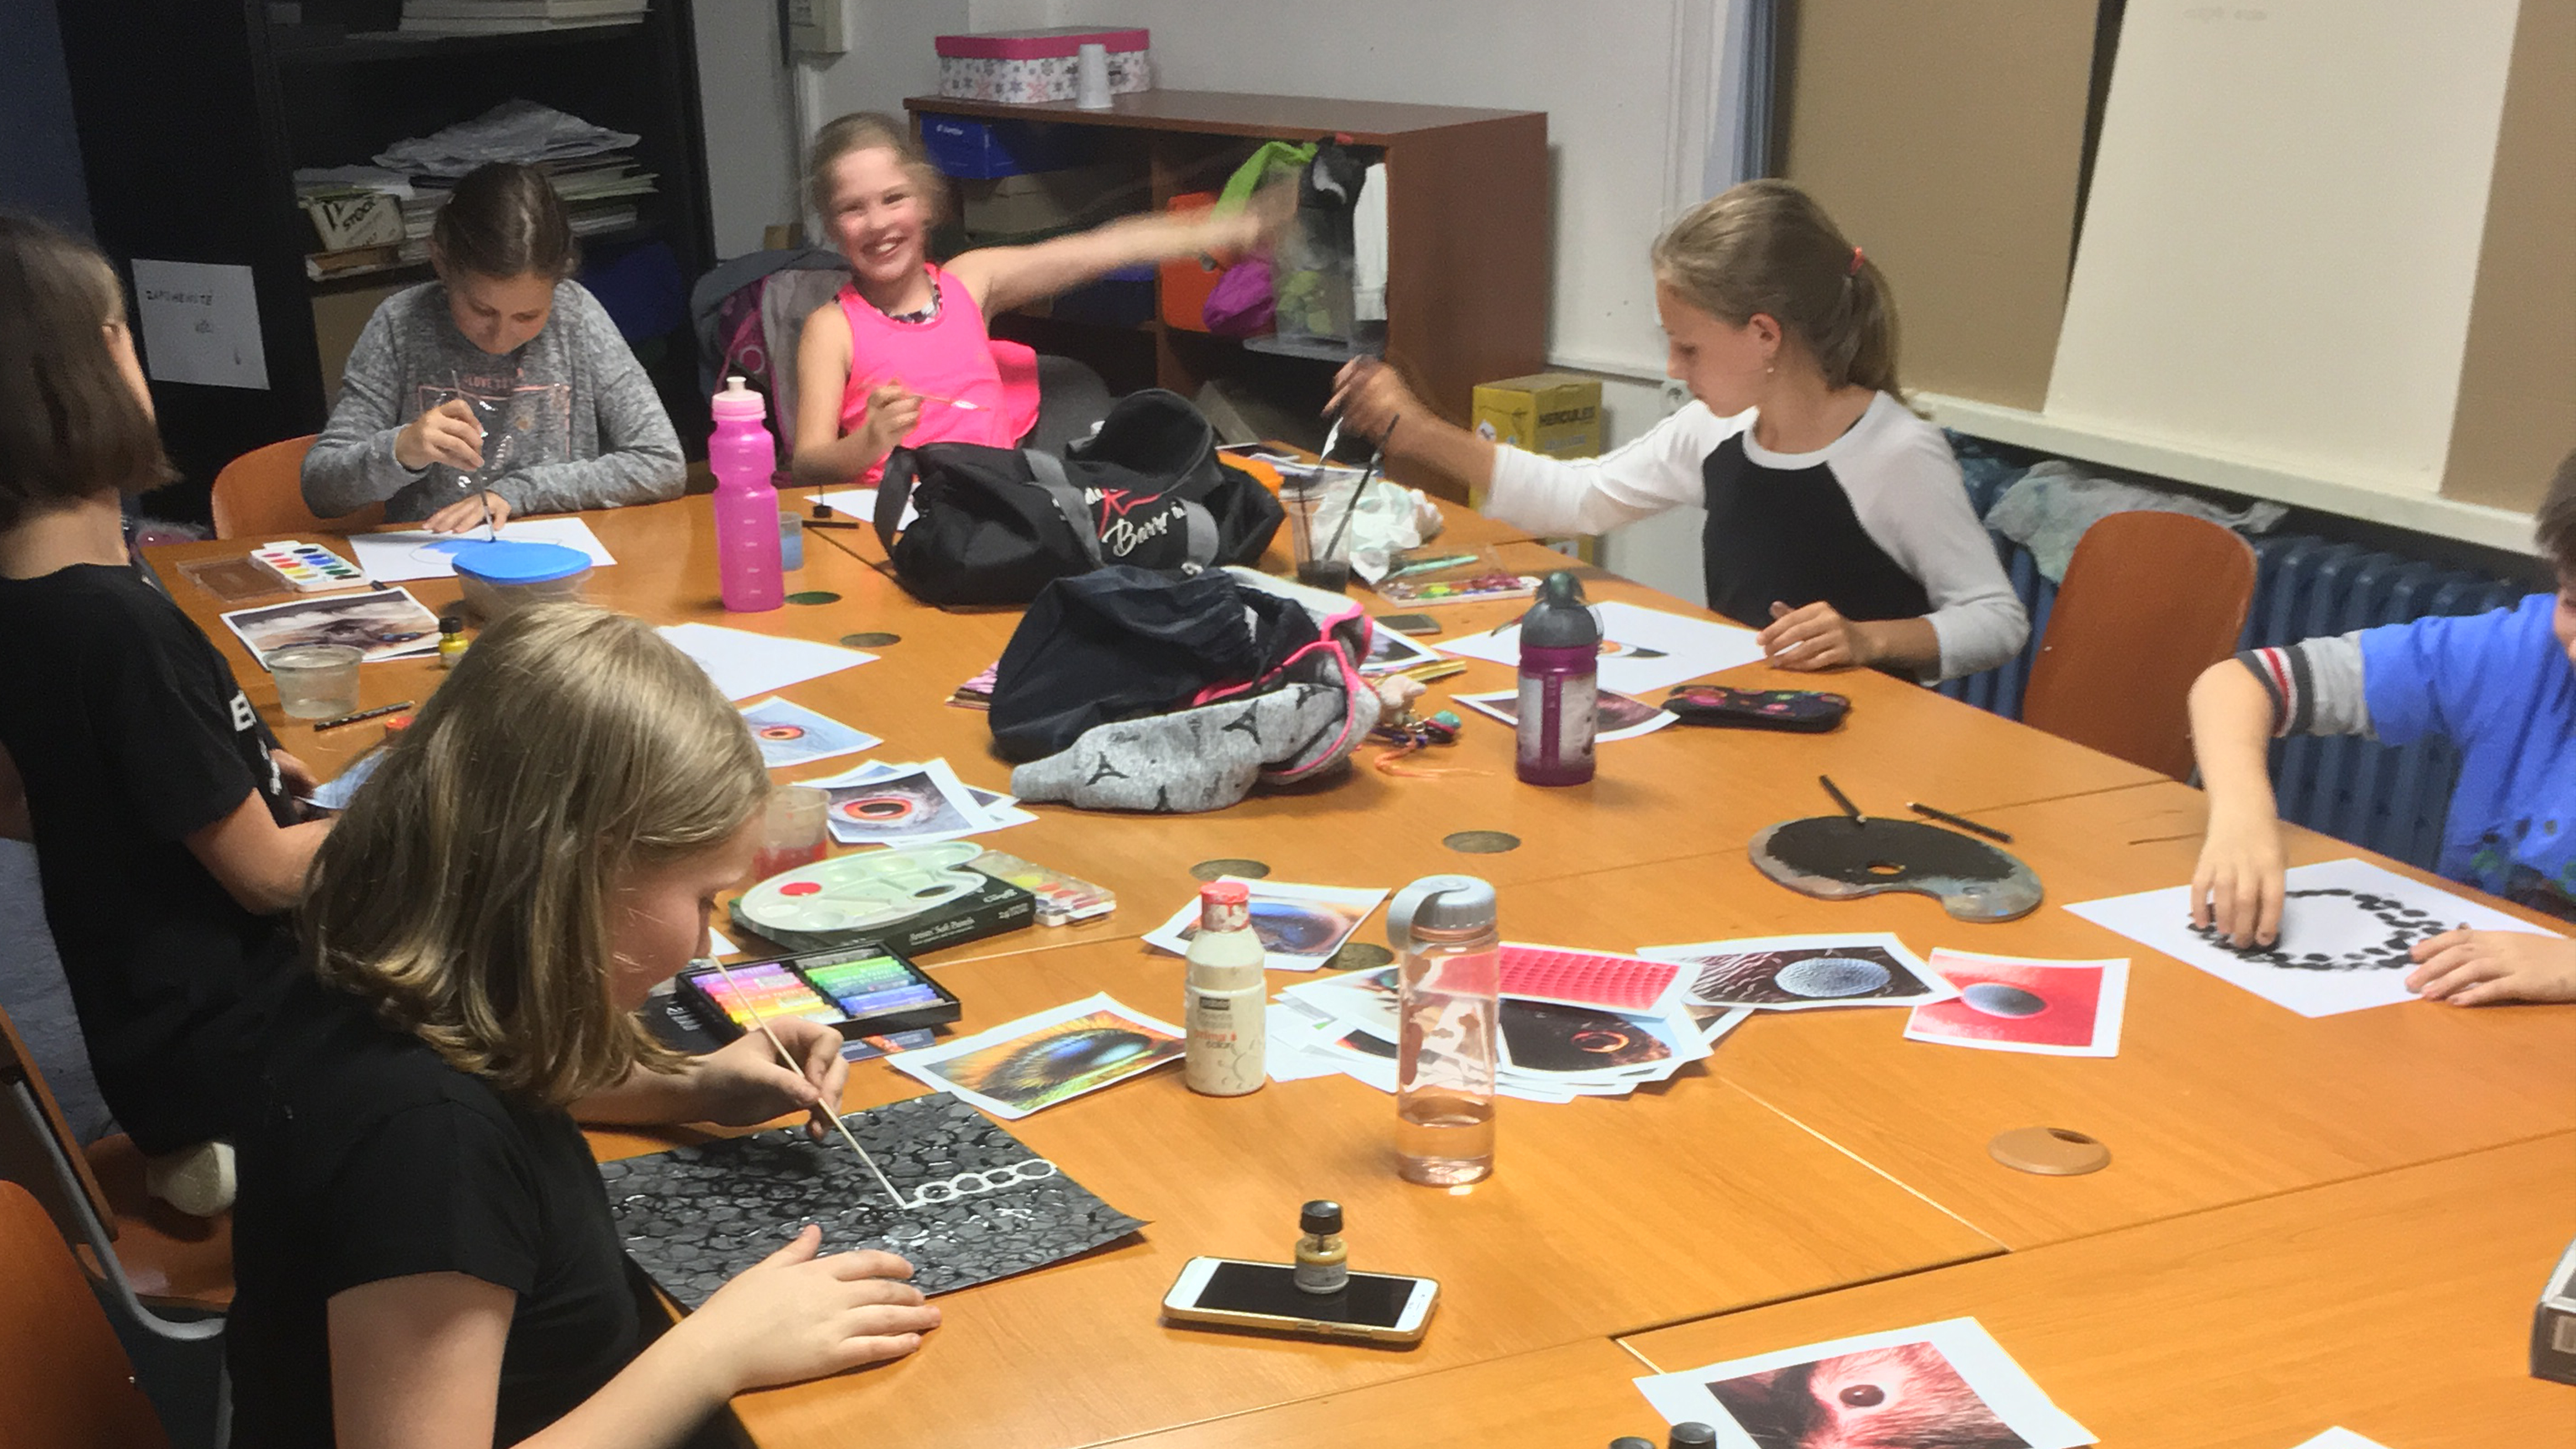
- Active work of the student (concrete handling): Animal eye study: Enlarged painting (ink painting, watercolor or tempera painting, pastels) of the chosen animal and its life during art creation.
- Presentation of findings and results - graphic format / visualization of information: Align all paintings together and talk about the similarities and differences of each species. Try to find different arrangements based on specific reasons (shape, colour...)
- Analysis of results: This task open question about diversity and difference of visual perception of the same location in a friendly way for students. The appearance of the eyes also links to evolution and specifics of each species. This and thinking about the possibilities of animal life leads to better understanding the individual needs of the animal and to respect different point of view at all.
Project/design phase - part 1
- Second action that unfolds the practical activity: Question: "How does the design of eye affect the visual perception?" The dialogue between students and teacher about specific designs of eyes by nature and its meaning. (Support material: Educational sheets with information about specifics for each animal.)
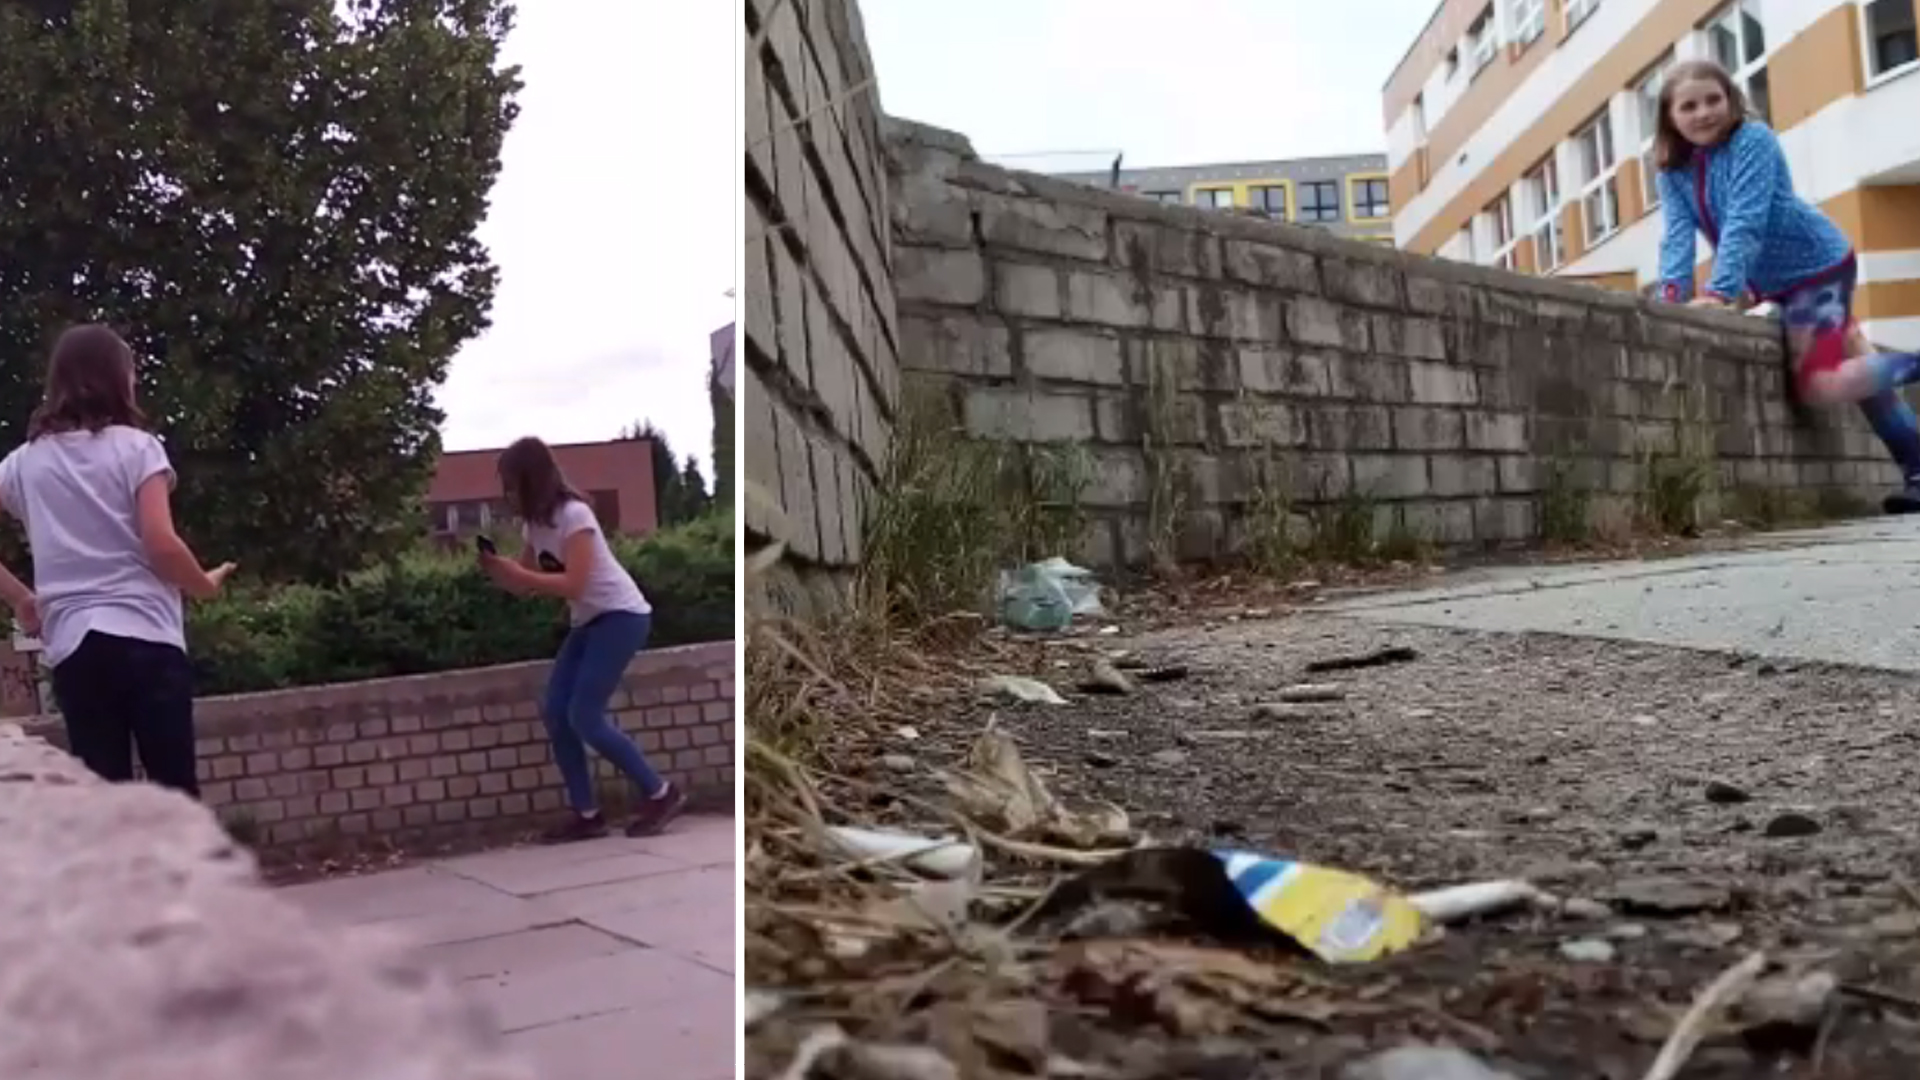
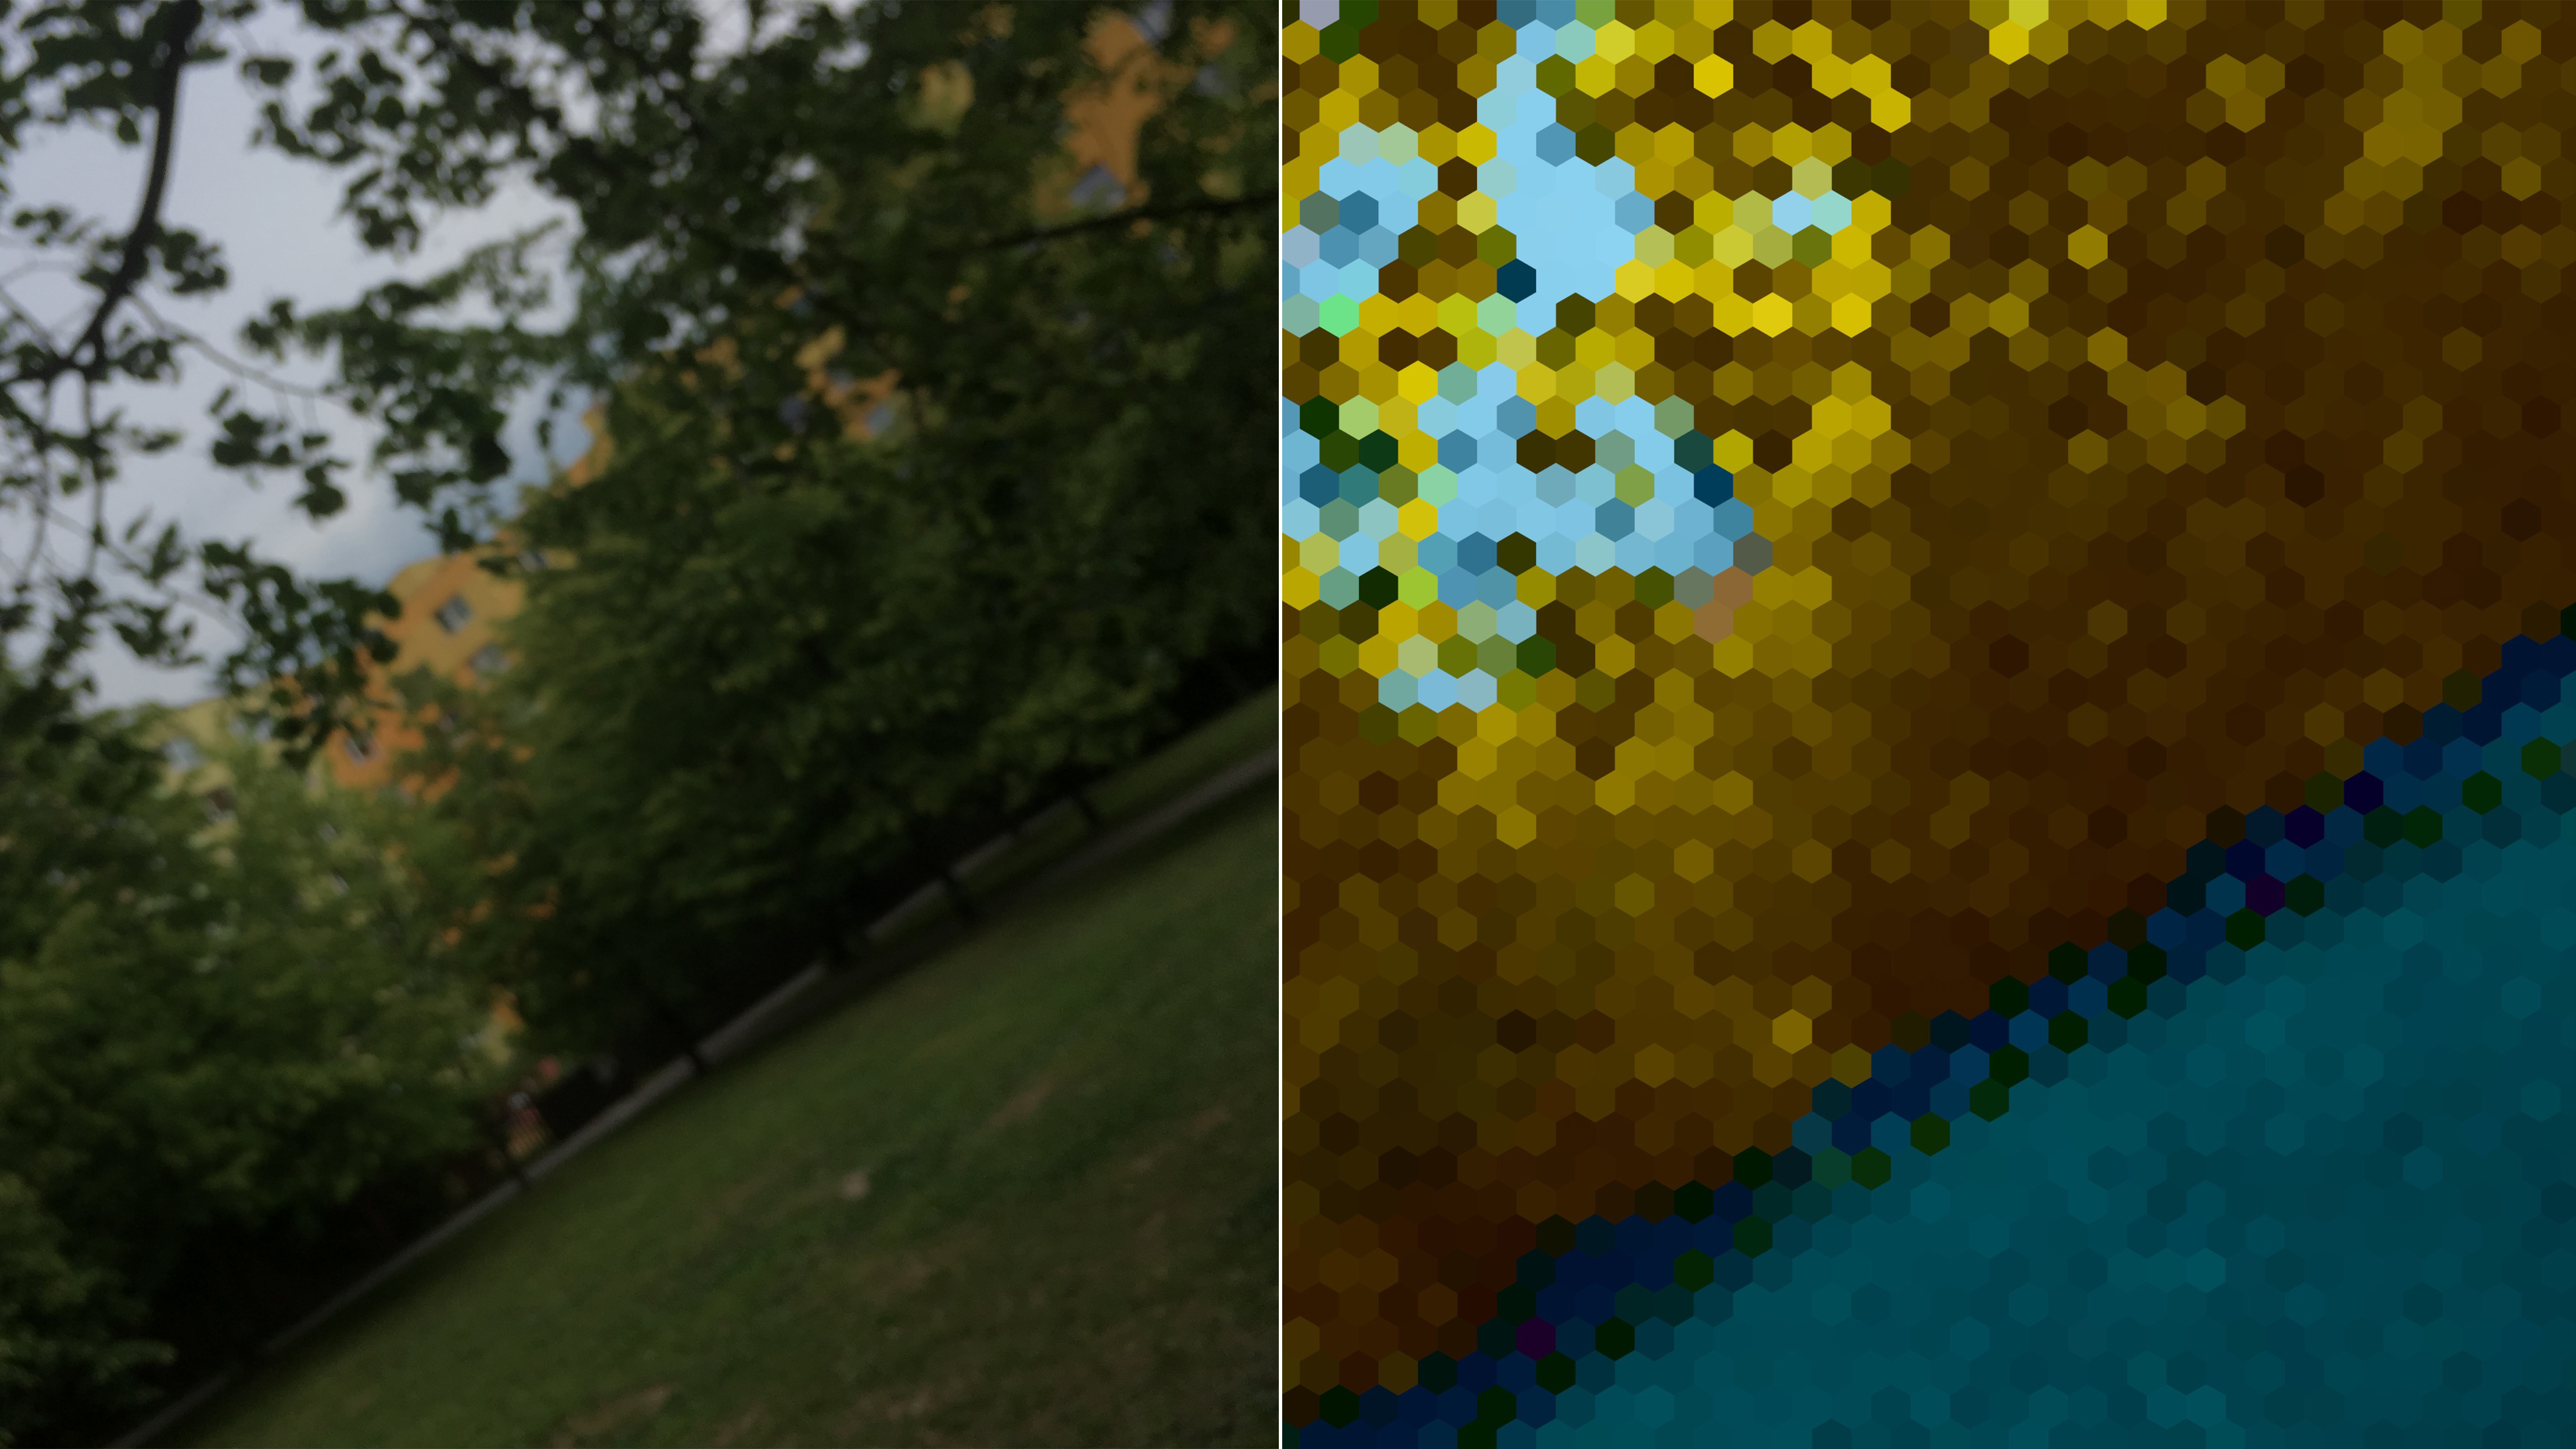
- Active work of the student (concrete handling): As an animal: Take own series of photography or video of urban open space as human and as a chosen animal (insect, dog, bird etc.). Try to focus on the typical angle of view and various colors around. Then change the picture to a specific one for the animal (colo made, blur, sharpness...) by using a special graphics apps (PhotoDirector, Colour Changer, Photoshop Fix, Mosaic Blur).
- Presentation of findings and results - graphic format / visualisation of information: Printed photos of "normal" and animal view for comparing through dialogue between students, presentation of each animal by the student.
- Analysis of results: This task gives the student's the possibility to be more emphatic with animal neighbors and to more understand its life in the city. And it was really well accepted.
Project/design phase - part 2
- Third action that unfolds the practical activity: Question: What are the ways of communication with using new technologies? (What are the strength and weakness?)
- Active work of the student (concrete handling): The story of the Animal: Through the inspiration of new ways of communication in our digital epoch - blog, websites or chat - students told a day/life story about their animals. They mixed gained knowledge with a fantasy because the concrete animal was the one who presents itself. It was realized in a paper way using sticky paper blocks, own smileys, printed photo of the animal eye and their vision.
- Presentation of findings and results - graphic format/visualisation of information: The presentation is the work itself where students put gained knowledge and also the introducing of the animal story to the others.
- Analysis of results: This task was interesting for children because they never tell the story in this way. On one side it was fun for them and on the other side this task naturally integrated gain knowledge and created pictures of the animal vision.
Approach to a new software or a new app:
By few examples of modification - photo before and after etc. And visual examples and discussion about how can be used similar software by the more creative way than are common.
Link of the Digital Atelier with the real life of the students:
The main part of DA was realized in a park in front of the school which students pass every day during a school week. So the aim was to try to look more deeply into the wellknown place, which is inhabited by humans and animals as well.
How do you imagine to evaluate knowledge and skills?
Through dialogs during all atelier and by same questions which will be given to children at the start and end of this atelier: Do you know how our sight works? Can you imagine that you are able to simulate animal vision? Which tools do you need to realize it?
Conclusion:
This DA was designed for the youngest of App Your School project. It could work well as the first experience with technologies by the creative and educational way. The teacher can show the students several possibilities how to use differently the most common for them - cell-phones camera and photo apps.
The publication was created as part of the project: APP YOUR SCHOOL.
This publication reflects the views only of the author, and the Commission cannot be held responsible for any use which may be made of the information contained therein.
